Activating Mync
Activation of the serial number and eID is required at the first startup of Mync. Mync cannot be started if the serial number or eID has not been activated.
-
You only need to activate Mync when you use Mync as a single product.
|
|
|---|
|

1) Double-click the Mync icon on the desktop.
-
The entry screen for the serial number is displayed only when Mync is started for the first time.
 Alternative
-
If the Mync icon is not on the desktop, display the Windows start menu, and then click [Grass Valley] → [Mync 11].
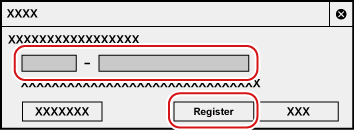
2) Enter the serial number, and click [Register].
-
If the serial number is correctly activated, a confirmation screen appears.

-
Use the serial number given at the time of purchase.
-
Enter a 6-digit character string in the left field and a 16-digit character string in the right field for the serial number.
-
Please note that the serial number cannot be reissued. Keep the number securely.
-
The serial number can also be registered using the following procedures.
-
Display the Windows start menu, click [Grass Valley] → [GV License Manager] to start up GV License Manager, and then click [Online activation].
-
3) Click [OK] on the confirmation screen.
-
The entry screen for eID appears.
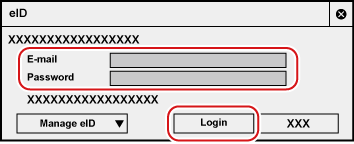
4) Enter the registration information for eID, and then click [Login].
-
Once the eID is correctly activated, the serial number and eID will be linked, and Mync will be started.
-
If you have used an older version of Mync, you will be prompted to migrate the database to Mync 11 at the first startup. See Database migration for more details.
-
For [E-mail] and [Password], enter the registration information for eID.
-
For details on eID, see Creating eID .
-
The serial number information of all products registered to the PC that use the eID are linked to the eID.
-
If your eID has not been registered, click [Manage eID] and then [Don't have an eID?], and register eID.
-
If you have forgotten your e-mail address or password, click [Manage eID] and then [Forgot your email address?]/[Forgot your password?], and reset them following the on-screen instructions.
Database migration
Follow the instruction on the screen displayed at the first startup of Mync 11 to proceed migration of the database from an older version of Mync.
-
Data that can be migrated
-
Source, and metadata added to data
-
Catalog, and data within the catalog
-
-
Data that cannot be migrated
-
Smart catalog
-
Storyboard
-
Imported histories
-
|
|
|---|
|