Importing Sources
You can import sources from a device connected to PC or sources stored in a PC. The sources are transferred to a specified folder of a PC, and registered to the library at the same time.
This section describes how to import sources from a device connected to PC.
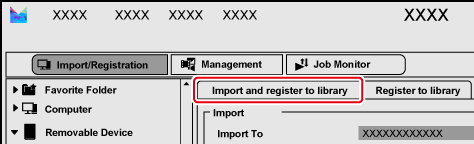
1) Click the [Import/Registration] tab.
-
The display of the sidebar and thumbnail pane will be switched.
-
The import settings pane is displayed in the upper part of the thumbnail pane.
2) Connect a device to your PC.
-
The connected device is displayed in [Removable Device] on the sidebar.
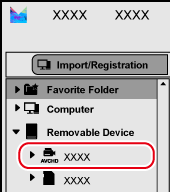
3) Select the device on the sidebar.
-
The sources stored in the connected device are displayed in the thumbnail pane.
4) Click the [Import and register to library] tab in the import settings pane.
-
The [Import and register to library] pane is displayed.
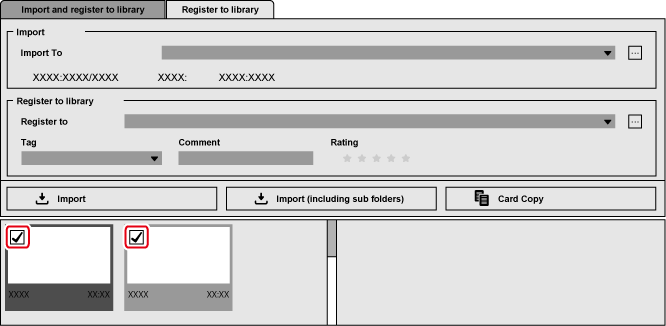
5) Check the sources you want to import.
-
This step is not necessary when you batch import all the sources in the device. In step 8) , click [Import (including sub folders)] or [Card Copy].
6) Click [...] of [Import To] for [Import] to specify the copy destination of sources.
-
Alternatively, you can click the [Import To] list button and select a copy destination from recent history.
7) Click [...] of [Register to] for [Register to library] to specify the registration destination of sources.
-
Alternatively, you can click the [Register to] list button and select a registration destination from recent history.
-
Metadata such as tags and comments can be added to the imported sources.
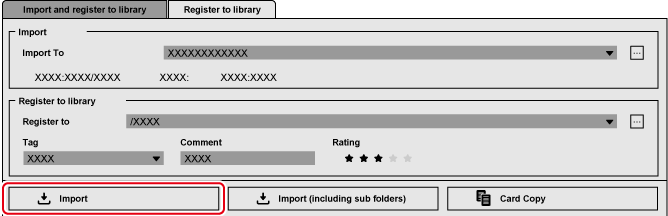
8) Click [Import].
-
Import of the sources is started.
The sources are copied to the folder with a date created within the folder specified for [Import To], and registered to the library as assets.

-
Mync can be started also from the auto play dialog box displayed when a USB device is connected.
-
AVCHD sources that consist of multiple separate files are registered as a single asset.
-
Right-click on the device name on the sidebar, and then click [Eject] to remove the device.
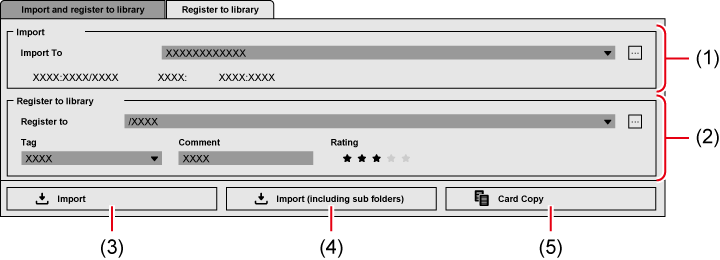
[Import and register to library] Pane
|
(1) |
[Import] |
Set the import destination folder of sources. Information including the free space of the storage on the PC and the total data size of the selected sources are displayed. |
|
(2) |
[Register to library] |
Set the destination to register sources. Configure the metadata to be added to the imported sources. |
|
(3) |
[Import] |
Register sources to the library as assets at the same time when they are imported. |
|
(4) |
[Import (including sub folders)] |
Regardless of selection of checkboxes, all the sources in the folder of PC selected on the sidebar and its subfolders are copied and registered to the library as assets. |
|
(5) |
[Card Copy] |
Regardless of selection of checkboxes, all the sources in the folder or device are copied and registered to the library as assets.
|