Adding Markers
You can add a marker.
-
The default color of marker is orange. The color of a marker can be changed in the properties pane.
1) Select an asset in the thumbnail pane.
-
A preview image will be displayed in the preview pane.
2) Display the frame to add a marker on the preview pane.
-
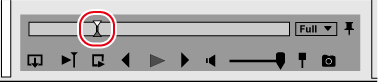
Move the slider to the position where a marker is to be added.
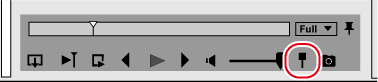
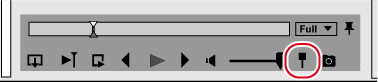
3) Click [Marker] in the preview pane.
-
A marker is added to the position of the slider on the position bar.
-
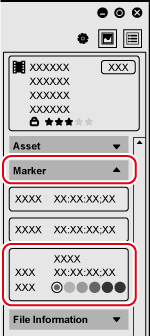
The information of the added marker is displayed in [Marker] of the properties pane.
 Alternative
-
Adding marker: [V]

-
By dragging the marker on the position bar, you can change its position.
Setting Marker with Range
A marker with range can be set using an existing marker as a starting point.
1) Perform steps 1) to 3) in Adding Markers .
-
Set a marker.
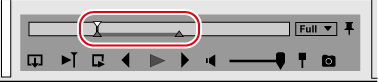
2) Move the mouse cursor onto the set marker, and drag it to the right while holding down [Shift] on the keyboard.
-
A marker with range using an existing marker as a starting point is set to the position bar.
-
The information of the added marker with range is displayed in [Marker] of the properties pane.
-
By dragging the marker with range set on the position bar, you can change its range.
Deleting Markers
You can delete a marker.
1) Select an asset in the thumbnail pane.
-
A preview image will be displayed in the preview pane.
2) Click [Marker] in the properties pane, and select the information of a marker to delete.
-
The slider on the position bar moves to the position of the selected marker.
3) Click [Marker] in the preview pane.
-
The selected marker is deleted.
-
The information of the marker in the properties pane is also deleted.
Alternative
-
Deleting marker: [V]